
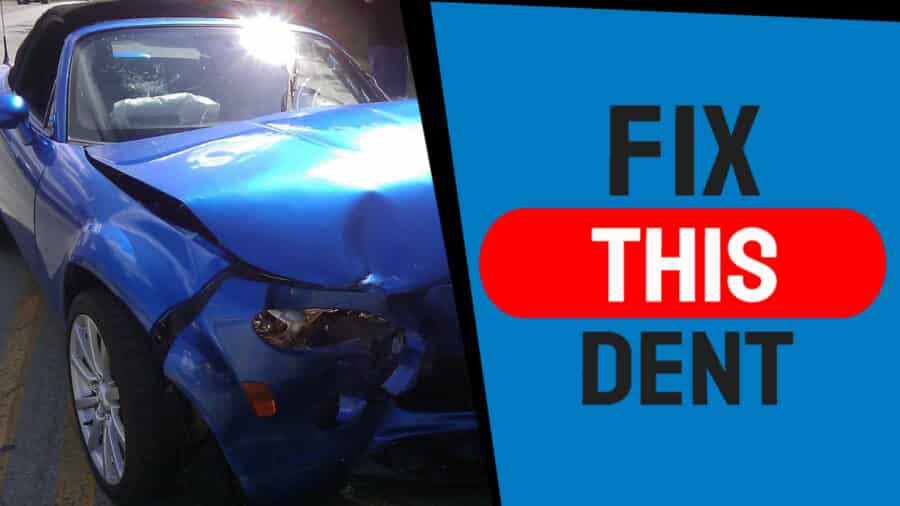
How to Fix a Door Dent in a Car
What to learn how to fix a door dent in a car? Look no further and check out this video. Learn paintless dent repair now.
Video Summary
This video How to Fix a Door Dent in a Car, is all about a brand-new Volkswagen Transporter with a massive car dent! I’m not joking either take a look that rear door WOOOOW So stay with me and I’ll show you of the methods I use to repair these doors back to the former shape¦. HI thanks for joining me on another PDR and this time is certainly a nasty one. I’m Martin Sadler from Dent- Remover I’m going to show you how to fix a door dent in a car, now this repair took a long time to do so we’ve broken the video down into two episodes¦. So, grab a drink, put your feet up and enjoy PART 1 Taking a look with the inspection board we can see that the right-hand side door has really took a good beating, also on the passenger door there’s a smaller car dent but it’s right on the edge. time to get this vehicle in the workshop so we can have a good look at the damage Taking a look at this Humongous dent in the door I’m going to mark it up and break it down into sections to explain each part in detail So first of all we can see the total damage is approximately 740 x 320 millimeters…
On the edges we’ve got a load of crowns and we’ve got to RESPECT THOSE CROWNS once I’ve lifted the majority of the panel out I need to tap these areas down and it’s going to release the pressure and also strengthen the middle of the panel up… Taking a look at the center of all this mess we’ve got the impact Centre, it’s a large crease damage we’ve got to be very careful not to stretch this area and because of the severity of the impact is really deformed a factory bodyline The damage has stop moving at the bottom of the panel where the door frame is, its GLUED, TRIPLE SKINNED and extremely difficult to repair Looking towards the right-hand side of the damage and the cause one of those crowns we’ve got a vertical body line dent…
And then if you slide your eyes left, you’ll notice because this horrendous looking dent it’s SHARP, DEEP almost certainly STRETCHED and its messed up the door edge. Unfortunately, the other door was caught in the accident and he’s made a slight horizontal crease and because the panel was pushed in the frame has put a protrude in line in the panel I don’t want to damage the factory sealer so I’m going to be glue pulling this door dent from the outside also we don’t want to be using any drain holes for access and I won’t be stripping this door either There you go, Looks bad doesn’t it? YEAH! So what kind tools do I need to do a repair like this let’s go take a look okay before we start the repair let’s look at the tools I’ll be using a sighting board I can see the damage I’ll be using a Blending hammer and a range of knockdowns going from a Blunt nose all the way down to a Sharp tip for more precision using a range of bars and these are ideal for open areas got a flat tip tool, got the ultra-dent bars double bend screw tip bar, and a homemade sharp bar then we’ve got the hula hoop bar which is ideal for working back on yourself in open areas I’ll be using two pistol grip tools all of the screw tip feature The Anaconda set will be used today because it’s great again for working in open areas and then moving along to my selection of screw tips these are the ones that I’ll be using today ranging from soft to sharp For the glue pulling parts we’ve got the Pull Dog slide hammer a Wurth mini lifter with adjustable feet And to warm the hot glue up I’m using my slightly used eliminate glue gun! and to take the glue off I’m using GTechniq panel wipe my favorite selection of tabs we’ve got the KECO ice, and the GANGRENE tabs and finally the COLD glue system I’ll be using today is from STICKY BEAST PDR COLD GLUE Before we do any kind of glue pulling whether it’s hot glue or cold glue we need to degrease the panel, so using really good degreaser like the Gtechniq panel wipe and I know GLEXO sell a disposable wipe that’s really good.
Give it really good soak using a brand new rag as well don’t want to be using anything with polish on there because just going to be defeating the object, give it a really good wipe… then using the heat gun just takes away evaporates all the panel wipe residue and then you’re good to go this cold glue is super sticky you certainly don’t want to be wearing latex gloves when you’re handling it I found that the best way to handle the glue is by using the nonstick paper get the glue into some kind of shape stick it to your tab and then we can attach it to the sliding hammer OK let’s start repairing this car door dent I’m just going around with the heat gun to warm up the panel just to make it move a lot easier going to give the cold glue a slight warm-up as well and then we’re going to stick the cold glue to the dent OK that’s the first pull and see how effective cold glue is on a repair like this and you’ll notice that I’m not yanking for damage out with a slight hammer and just using the slide hammers weight to gently pull the door dent out by doing it this way you’re not going to over stretch the panel so you’re not giving yourself any extra work.
After a quick warm-up just to make the glue really tacky I’m going to stick it back on to the panel use the slight bit of pressure and then carefully draw the car dent out So far this panel has been moving really well I’ve just got one more pull to make on the right hand side and then we’ll take a look to see how the damage has come out so far… okay so this is where I’m at after using a cold glue system quite a few areas that still need attention A couple of crown areas, low areas there and a slight crease that’s running just above a body line also got this area here which is going to be quite tough to repair you need a bar tool in there and tweak it out very carefully using a lot of heat and tap the edge in and it would just give it a lot more strength but what I’m going to do now, il take the inner trim off have a look behind the panel see what’s what and then we’ll take you from there Removing the interior trims on transporters is usually a straightforward process on this one we’ve got an extra trim on there so these clips are really long so I found the best way to remove these is by getting two flat head screwdrivers one on each side carefully tweak the middle out and remove this with the trim tool and then get the trim behind the board give it a wiggle and clips will finally release this vehicle has been professionally converted into a day van so there’s plenty of soundproofing in the doors that we need to remove as well as the soundproofing we need to move wiring out for way just so we don’t catch it with our tools also we’ve got a mechanism and this bar goes to the door handle so we’ve taped it out the way so we don’t break this little white clip at the bottom so now this is stripped and out of the way we’ve got loads of access to the rear of the damage Picking the first tip and I’m using a whale tail tip and a small extension I’m going to attach this to the Anaconda bar just turn it up there and make sure it’s straight like that.
Keep reading to learn how to fix a door dent in a car. So, the reason why I use this tool to start off is because it’s a flat bar so when I’m using the door frame to lever off like this there’s no chance that the bar will slip out from under my hand and potentially create more damage that then needs a repair So by using the bar like this it’s quite long I don’t need to put a great deal of pressure on there to get things moving and it’s quite comfortable to use. Matching it up with the whale tail tip because this is the crease dent using the whale tail is going to enable me to move a lot more or for damage with each push that I make The next bar I’m going to be using is the Ultra Dent Tools bar and I’m going to match this with the screw tip and it’s got a plastic cap on the end The area that I’m going to be repairing now it’s just slightly underneath the body line now this is quite a sharp tip for lifting up shallow areas like this and I do actually use the big soft rubber ball as well but for now I’m just lightly working the area and I’m also going to tap around the edges with a blending hammer just trying to free things up okay after spending some time chance to straighten up below the body line we’re now moving to the top where is this crown we’ve warmed it with a heat gun to make it more malleable using this tap down from CRO Carb it’s got flat leather head so with each tap we’re moving a lot of metal its€™s ideal for these types of areas.
There’s also quite a harsh crown at bottom of this door so I’m going to use the same method to repair this area too. so I’m at stage now where I’ve tidied up this crease I just knocked down a few crowned areas but now I’m going to start repairing this bit and to do this I’m going to start off the glue going to put a little tab on there, pull it out see where we’re at and then I’ll finish it off with the bars So the ammunition I’ve got my glue gun today is ALDI Glue! was using the GLEXO hot glue and TABWELD both superb glues, but I’ve run out so this is the substitute The reason why I’ve picked a rectangle shape tab as opposed to a round one is because when I apply the force with a mini lifter it’s going to lift up a damaged area roughly the same shape as the tab Now I’m not expecting to repair this car door dent fully with just the glue what I’m doing is I’m just lifting up the softer areas seeing how it goes and then from there we can get a bars behind there and lift up the rest So I finished with a glue for time being and I’m going to get my bar in there now and just see how it moves so I’ve got the plastic screw tip on and we’re going to get right into the edge there starting from the top right in the corner and then gradually working our way down this damage looks an absolute mess but it is coming out very slowly when I’m working on complex dents or complex areas like this I break it down into many sections this way I’m not going to get overwhelmed by overwork now lift one area up at a time don’t lift it up so it’s absolutely spot and then a move on to the other area get all the areas looking something like then I’ll go back and finish the areas off Using the Ultra Bar it was quite difficult to get the leverage because I was working with my arm right up in the air so I’ve picked the hula hoop bar this is ideal for working back on yourself there’s a lot of leverage there and you’re not having to stretch around all the way out.
Okay you can see from here that the dent has come out quite a lot, but it started to lock-up right in this corner, so I need to be precise when we’re pushing this area and then finish up all this area the screw tip, I’m using now is a plastic bullet tip also have a modified version I’ve sanded it down. This is great when you need to put a lot of pressure behind the dent I find that with the short version I can be a lot more accurate with my pushes without the risk of it either snapping or slipping okay so I’ve speed this part up because it literally took hours to repair this small dented area, you can see that I’m gradually pushing the dents out from within the panel to the edge and then I’m tapping it down gently with a sharp knockdown once I’ve lifted up this damage and then get a tap back the edge and get it back into shape.
Okay so I’m a little bit backwards and forwards with all of different bars I’m using but I’m just putting on a soft rubber screw tip onto this ultra-bar, gently lifting up the shallow areas I’ve just circled and other lows around this area Using the inspection board and looking towards the edge of this door we can see that things are shaping up really nicely Okay that’s it for part one thank you very much for watching so far if you did enjoy it, would be great to get a thumbs up if you didn’t enjoy it, don’t be shy just tell us why… And if you’re not subscribed already it’d be great to get you on board because this really does help my channel will grow and if you take the notification bell when PART 2 comes up, you’ll be notified straight away…
So, look out for PART 2, take care and see you soon….
I hope you enjoyed this video on how to fix a door dent in a car.
For more check out DIY Dent Repair.